This wreath (one of like 6 in the house) was inspired by the Starbuck's wreath from last season. There are two different sizes of red ornaments and two sizes of green yarn balls (thanks to my hubby who wrapped them all for me !!)
Friday, November 27, 2009
Wreath overload....
This wreath (one of like 6 in the house) was inspired by the Starbuck's wreath from last season. There are two different sizes of red ornaments and two sizes of green yarn balls (thanks to my hubby who wrapped them all for me !!)
Thursday, November 26, 2009
Happy Thanksgiving!
Tuesday, November 24, 2009
Grandma's Glittery Birthday!
If you remember, a few weeks ago, I was going to my Grandma Mary's 80th birthday party. She was joking around that she was turning 40 and made a big deal out of no one mentioning that it was her 80th birthday. So, to honor her wishes :), I made her a 40th birthday card. I tried a few new things on this card, for starters, I used my Top Note die to cut out that orange felt. It went through my Cuttlebug like butta! Then I adhered some wide brown lace to the bottom and adhered the entire piece on the front and over to the back of the card. I had an old Prima flower I wanted to use but it was too peachy for that orange Top Note, so I smothered it in Martha Stewart glitter! For the 40, I trimmed those out with my Alpahlicious cartridge and smothered them in gold Martha glitter. I used sentiments from PTI's Life and hand wrote the "th".
Monday, November 23, 2009
For my baby boy.......
I am a very lucky mom. I have two beautiful girls and an adorable little boy. I never thought that I could have such a different bond with a son, but he definitely is the light of my life !! There's just something so special about a momma and her boy.
Thursday, November 19, 2009
Flower Hair Clips
My project for today is one that was super simple but that turned out so great I'm sure to make it again and again. At the beginning of the school year I bought a bunch of clothes for the girls at Children's Place and their "theme" for fall was green, orange and brown. I made these little hair clips for them, and they perfectly match their clothes! I started with a Sizzix flower die and cut out four brown and four orange flowers, in four different sizes. (is that confusing or what?) The die has four different sizes on it so I just ran it through my Cuttlebug twice. Once for the orange and once for the brown. Then I layered two of the flowers together and sewed on a PTI New Leaf Vintage button with some brown embroidery thread. To finish off the metal edge of the clips, I glued on a little piece of brown satin ribbon. Then I simply adhered the flowers to the clips! These took no time at all to make and I can't wait to make more!
Becky
Monday, November 16, 2009
Merry Christmas Teacher
I'm so excited to share my little creation with you tonight.....I'm in full gear Christmas mode and this is by far one of my favorite things !! I started with a wooden embroidery hoop and inked up the edges to give it a darker hue. My original thought was to put the paper on the hoop just like fabric, but it was way to thick. I ended up adhering it to the back of both hoops.....kinda gives it a shadow box look:
Saturday, November 14, 2009
Christmas Card Gifts
I've been busy here, crafting away. I'm making a few sets of cards for gifts this year and decided on a four seasons theme. These first two cards are the winter/Christmas cards for the winter season.
I used my Cuttlebug Swiss Dots folder on a white background and simply layered on light blue card stock, winter themed patterned paper, thick rustic looking twine and glittered snowflakes. I love the chunky twine with the delicate glittery snowflakes!
I hope you have a fabulous weekend! We have a busy day tomorrow, celebrating our Grandma Mary's 80th birthday. I'll be sure to catch you on Tuesday, until then...happy crafting!
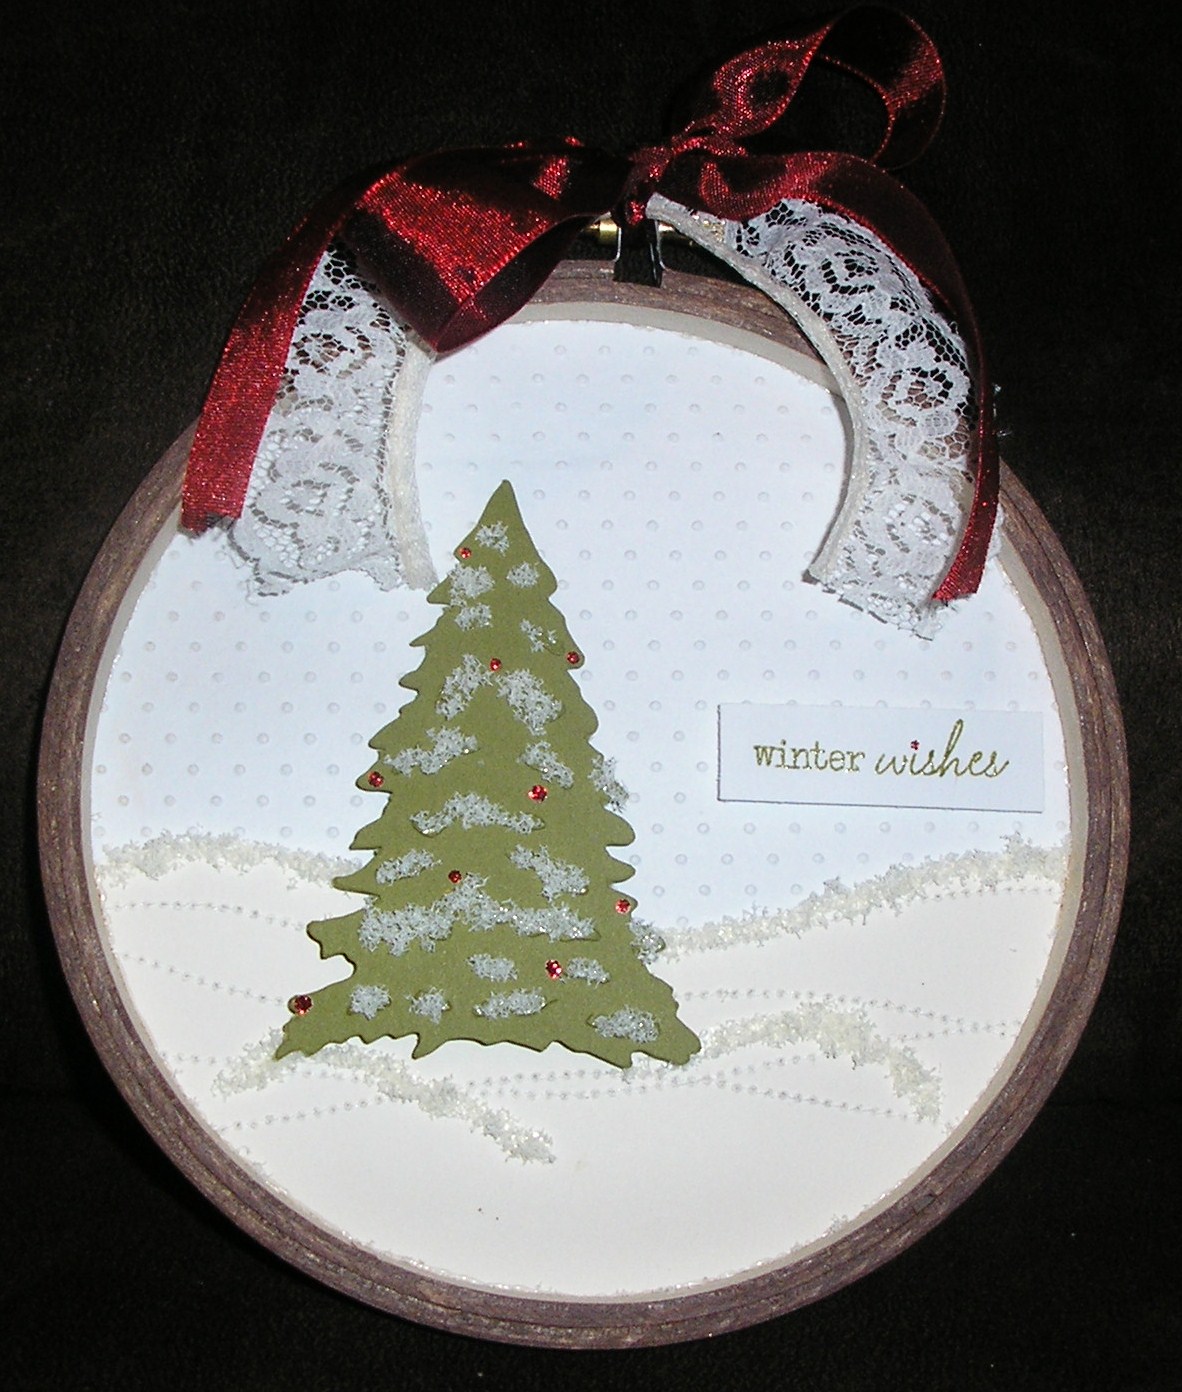
Thursday, November 12, 2009
Polka Dot Birthday Cherries!
My card today is a cute little 4x4 card I whipped up for Abie's friend Paige who turned 8 this past weekend. Paige is a girly girl and I wanted to make something to reflect that girliness! I started with a black base and heat embossed big clear polka dots on the front. Then I layered on a pieces of Raspberry Fizz Bitty Dots Basics patterned paper. I stamped the cherry stems from Everyday Button Bits in New Leaf Green onto a piece of Basic Grey pale pink card stock which I trimmed into a scallop circle and added two Raspberry Fizz buttons. Rather than stitching the buttons on, I adhered a couple of Kaiser gems in pale pink to the button holes. Next to the stems, I stamped the happy and birthday words from PTI's Let Freedom Ring set. To add a bit of sparkle, I drew around the scallops with my Quickie Glue Pen and sprinkled on some of Martha's Crystal Fine glitter. I popped the circle up with a pop dot and added it to the card front. I punched a hole in the top of the card to run twine through to tie it to the package.
I hope you all have a fab-U-lous evening! Tomorrow is Friday!! Woo hoo!
Tuesday, November 10, 2009
Veteran's Day...a day early
All supplies by Papertrey Ink
Monday, November 9, 2009
Wrappin' gifts already......
I decided to get started wrapping up gifts and getting ready for all the craziness of the holidays. The tea towels I've been embroidering daily are going to friends and family. I decided on two towels each and wrapped them with twine. I finished them off with top note tags, lace, ribbon and a few holly berries:
I love the way they turned out and hope everyone will enjoy them !
Have a great night....see ya soon !!
">
Saturday, November 7, 2009
Fall Thanks
On to the tag! I used some older My Mind's Eye two sided patterned paper and trimmed out a rectangle which I then rounded the corners on. Then I stamped the more solid side of the paper with Vintage Cream ink and the smallest script in Background Basics Text. I hadn't used this font yet because I thought it looked too tiny but I LOVE IT and will definitely be using it again! Next I layered on a piece of the patterned side of the paper that measured slightly wider than the tag and I punched the edge with my Upper Crest punch and I tied some Rustic Twine around the other end. While all this was going on, I set my Expression to trim out the leaves and acorns from the Doodlecharms Cartridge in 2". I placed three different colors of paper on my mat and the images were ready to go in a jiffy! After trimming them out, I spritzed them with some Glimmer Mist, which I bought years ago, but had only used once. I've seen a lot of people using Glimmer Mist lately and thought I'd give it a try. You know what? I LOVED IT too! :) I popped up the images with pop dots, after drying the glimmer mist with my heat tool and finished up the tag with a Mega Mixed Messages sentiment stamped in Vintage Cream.
I loved the way this tag turned out, especially on such a tight deadline, and thought it was the perfect tag for a little loaf of pumpkin bread!
I hope you have a great weekend!
Becky
Friday, November 6, 2009
Ornament Wreath
Wednesday, November 4, 2009
Last Birthday Card of 2009
I decided to make a card for him that was colorful......I'm already sad that everything around us is turning brown already : ( ......the leaves are falling fast and things are quieting down. So, I needed a happy happy card to celebrate today !!
Started with orange cardstock, 5-7.....the pp on top is from My Mind's Eye (ain't it fun !!). The balloons are PTI along with the sentiment:
All of the kiddos signed the card which always makes it special. We had a great dinner, great cake compliments of my sister and now it's time for baths !! Have a great night girlies !
Stacy
Tuesday, November 3, 2009
Teacher Gift for Halloween
This was super simple to alter. I just trimmed some Basic Grey June Bug paper to fit the front and back and adhered using my Xyron sticker maker. Then I simply created a little tag for the front.
Monday, November 2, 2009
For Teacher
I started with a chalkboard that I covered in gingham paper. I adhered clothespins that I had covered in solid green cardstock finished with red ribbon. The cherries are from Everyday Button Bits. In the lower right corner, I heat embossed her teacher's name (ok....that wasn't too smart !! but turned out cool !!). I hung a tag from the middle pin that simply says "for my teacher".
Have a great night !!
Stacy