Thursday, April 30, 2009

Grandma's Birthday

So glad it's Thursday, one more day until the weekend! It's Becky tonight and I've got a card that I just love. I got the idea for it from here. I just love Dawn McVey and all her creations. She's fabulous! So, this card I loved so much that I made several of them for my stash. This particular one is going to my Grandma Jean whose birthday is on Tuesday. I ran the blue cardstock through the Cuttlebug with the Textile Embossing Folder. I then used my Martha Stewart Butterfly Punch and added rhinestones to it. I finished the card off with some ribbon, a button and quilting pins and finally the birthday sentiment is from Upsy Daisy from Stampin' Up! Enjoy and have a great night!
Here's a close up picture of the card, love that embossing!


Wednesday, April 29, 2009

Spring Polish

Stacy here....well another rainy day and I was actually inspired today !! Today my little project is a miniature milk carton that holds 4 mini bottles of fingernail polish. I scaled down the holder to fit the polish (bought the little bottles at Wallyworld). Nothing gets me more excited about spring than all of the different polishes I like to experiment with on my toes !! Below is a front view:

Here is a side view:

This turned out so cute !! I made one for each of my girls and they loved them !! Have a good night and thanks for looking !!


Tuesday, April 28, 2009

Birthday Card

Hello all, it's Becky today with a lovely little birthday card I made for my big sister. Her birthday was last week and this is the card I made to go with her gift. I used the Out on a Limb set from Papertrey Ink and the sentiment is from Stampin' Up! Upsy Daisy. I used Versamagic ink, Bitty Dots Basics patterned paper, Autumn Leaves button and hemp twine to finish everything off. I was pretty happy with the way this turned out!

Here's an up close, side view of the card.


Monday, April 27, 2009

Post-It Note Holder
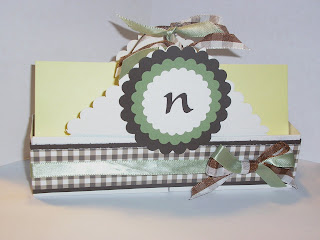
Stacy here !! My creativity level was really low today....probably all of the rain we had !! But, I came up with this really cute post-it note holder (my first thought was to put napkins in it for the kitchen table). To make the holder I used 2 mini magazine holders and secured them back to back. I covered the seam with PP and ribbon. A few scalloped circles and more ribbon and it's as simple as that !!

Side view: It's the perfect size for two post-it pads. Hope you enjoy !!


Saturday, April 25, 2009

Birthday Gift

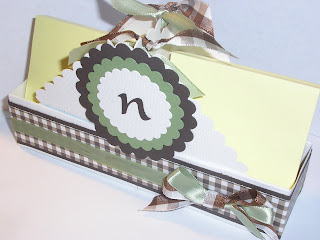
Happy Saturday! It's been cloudy here today but warm and windy. We spent the morning sanding and glazing our kitchen island. It turned out great! I just love it when you picture a project in your head and it turns out just as you imagined! Not only did that happen with our island but also today's project. This is a little something I made for my sister's birthday, which was April 22nd. I took a 4x6 notepad and stamped her initial in the bottom right corner of all the pages with my Just Rite Monogram Stamper, in brown ink. Then I made a simple box for it, trimming it with chocolate brown cardstock pieces I punched with my Fiskar's Threading Water Punch. I lined the inside of the box with Bitty Dots Basics patterned paper from Papertrey Ink. I tied a brown and white polka dotted ribbon around the notepad and set it inside the box. To wrap it, I simply folded the box up with some tissue paper and tied some more brown and white polka dotted ribbon around it to secure it. I made a coordinating card, which I'll share next week, and tucked it inside the ribbon. Hope you have a great weekend, see you next week!

Here's a picture of the notepad and inside of the box.


And last, a side view of the notepad in the box.


Friday, April 24, 2009

Happy Birthday Papa

Stacy here......hope everyone is loving this great weather !! It has been so nice here the last few days and it's hard to come inside and get creative !! Today I have a Happy Birthday Card for my father-in-law. He's a big fan of the local hardware store, so I decided to go with that theme. I had a little trouble trying to figure out how to make this card unique, and then I remembered that my husband does own tools........and I thought nails would look cool !!

Nails ???? I think you can scrapbook just about anything !!

Hope everyone has a great weekend !!


Thursday, April 23, 2009

Birthday Gift Tag

Aaaahhh, what a beautiful day we had here today. Sunny and 83 degrees! We've got the windows open and the attic fan on and I'm loving it! Tonight I have a card that was the gift tag I made for our neighbors birthday gift. I stamped the BIG cupcake stamp, from Stampin' Up! with Versamark and heat embossed it with Ranger Seafoam White embossing powder. I then cut the image out and attached some sequins to the dots on the front. I finished it off with a few more sequins at the bottom and some curly ribbon. Have a great night!


Wednesday, April 22, 2009

Just a Little Note

Hello everyone !! I hope everyone is doing good !! Today's little project is a little notebook that holds a 3x6 pad of paper and 6 decorated paperclips. It was super easy to throw together and would make a cute gift !! Here is the outside view:


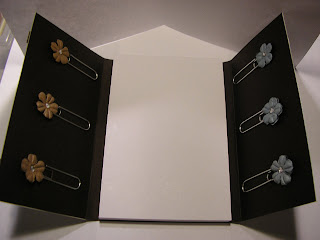
Inside: I used my notch tool to notch out six spots for the paperclips and decorated them with Prima flowers. Enjoy and have a great day !! Stacy


Tuesday, April 21, 2009

3 Ring Binder - Part II

Hi! It's Becky today with Part II of the 3 Ring Binder. I just love this , it's too cute! It measures 5x5 with a 2" spine. Stacy and I were so excited when we figured out how to make these, think of the possibilities: a menu planner, an organizer for the kid's activities, a birthday or holiday planner. Really, the options are endless. The first pic is a front view.
This second picture is a view from the end, with the binder laying down.

Finally, the third picture is of the binder, open and showing the dividers.


Monday, April 20, 2009

3 Ring Binder-Part I
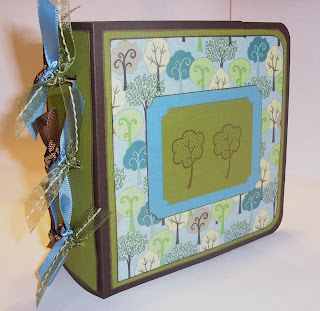
Happy Monday !! Today is part I of II on this super cute 3 ring binder. Last time Becky and I got together to catch up on our layouts, we started looking at a similar binder I had made and thought it would be fun to turn it into a 3 ring binder. Below is the front and side view. I tied ribbon around the rings to hide them and add a little flare. (I'm a minimalist at heart !!)

Here is the inside of the binder laying open. I made 3 dividers to go inside, the last one having a pocket to store receipts or notes:
And finally a close-up of the first divider. I decided not to name the dividers, I wasn't sure what I was going to use it for but it looks just as cute !! Stay tuned tomorrow for part II !!! Stacy


Saturday, April 18, 2009

Spring Cards

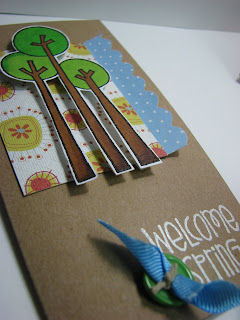
Well, it's Becky today and it's the weekend!! It was rainy here this morning but is supposed to warm up this afternoon. Today's post is a duo of spring themed cards. I used kraft colored cardstock as my base and layered on DCWV Green Stack patterned paper with a strip of light blue Bitty Dots Basics patterned paper that I punched with my scallop border punch. I then stamped two of the trees from the Spring Trees set from Cornish Heritage Farms on Papertrey Ink stamper's select white cardstock with Versafine black ink that I immediately heat embossed with clear embossing powder. Then I colored in both images, added some ribbon and buttons and finally heat embossed the sentiment with white embossing powder! The finished cards are 6x3. Such a fun size for something like this! I hope you have a great weekend and Stacy and I will see ya on Monday!


Friday, April 17, 2009

Laundry Clothspins

TGIF !!! Hope everyone is looking forward to a great weekend !! This little project I made was so easy and it looks sooooo cute in a bathroom !! There are times when my girls get a little fussy about their handtowels (can't share...lol) so I made these cute little clothspins that the girls can clip on their towels to tell them apart. I simply covered both sides with paper and sanded the edges. I used my label dies for the Cuttlebug to make the tags with their names on them. Embellish a little and that's it !! Now the girls can have their own towels and of course I had to make one for my son too ! The best part is that they are so inexpensive and the possibilities are endless !! Enjoy and have a great weekend !! Stacy


Thursday, April 16, 2009

Life Stationery

Howdy folks! How are you tonight? We've been enjoying the beautiful weather the last few nights. It was almost 70 here today! Tonight my post was inspired by a set of stationery I saw at Target last week. I'm not sure how many pieces were in the set or how many envelopes but it was $34.99! I saw it and thought, I could so make that for almost nothing! So I came home and got to work! I cut an 8 1/2 x 11 piece of paper to 8 1/2 by 5 1/2 and just stamped the bottom right with a stamp from the Life set from Papertrey Ink. I used the longer branch stamp first with an Eggplant Versafine stamp pad and then stamped the shorter branch stamp with an Olive Versafine stamp pad. To finish the set off, I lined my envelopes with coordinating paper. I just love the way this turned out and it was super easy! I know I would love to get a nice note or letter on this stationery, wouldn't you?


Wednesday, April 15, 2009

Mushrooms My Friend


Can you believe it's Wednesday already? Well, I've been patiently staring at these cute stamps I got at Cornish Heritage Farms. I love mushrooms in any form and was finally able to put them to use with this cute paper that Becky found. I embossed the word friend and the mushroom and the ribbon was inspired by Dawn McVey. Enjoy and have a great week !! Stacy


Tuesday, April 14, 2009

Lint Roller

Well, here it is, Tuesday already! I meant to get this posted earlier tonight but we've been outside enjoying the nice weather. It was a bit chilly but still nice compared to the last few days! Today's project is a lint roller I picked up in the Target Dollar Spot. My boss lives with cats and he's always borrowing my lint roller. So, I picked this up for him. Once home, I thought it looked very plain. So, I fixed it up a bit...
And here's the finished lint roller! I used some paper scraps for the wrap and ran it through my Xyron so there was plenty of adhesive on it. I then cut a 2" strip of kraft cardstock and ran it through my Cuttlebug with the Swiss Dots Embossing Folder. Then I finished it off with a little piece of ribbon. I know he won't appreciate all the work that went into this but I sure feel better giving this to him than the "naked" one! :) Have a great night!


Monday, April 13, 2009

Happy Monday !! I'm finally recovering from Easter.....I've successfully emptied every egg into the largest tupperware container I own and swept up a mile of easter grass ! My husband and I will be eating candy until Christmas ! I decided I was not going to touch anything pastel for a year---No luck !! The paper I used for this project was begging to be used. So, I decided to find a use for it and made this 3x3 note box for my sister (she loves purple !!). The template I used was given to me by my cousin that is a SU demonstrator. The paper is all HL, stamps are all SU and of course the cutest ever Martha butterfly punch. Below is a top and side view:


The cards measure 6x3, I used white parchment paper (I love the feel of writing on parchment). The stamp is SU and again the cute butterfly to tie it all together. Enjoy and have a great week !!


Saturday, April 11, 2009

Lip Gloss Holder

Happy Saturday/Easter Eve! It's Becky today and I have a super cute project to share. It's a lip gloss holder I made for Abie. I got the template from here and it went together very easy. I used some old Hobby Lobby patterned paper for the outside and stamped the birdy on white cardstock which I then colored with Bic Mark-It markers and highlighted the nose and flower center with stickles. I then cut out the image and poppped it up with some pop dots on a square nestability.
Here's an up close pic so you can see the bird popped up.

This is a "bird's eye view" (no pun intended) of the holder so you can see the lip gloss inside. I meant to take a picture of this when it was open but I tied it up and forgot :) Abie had come into the room and I was in a hurry to get the picture taken before she saw it! Well, I'm off to mix up Easter egg dye. Hope everyone has a great day tomorrow!


Friday, April 10, 2009

Thanks !


TGIF !!! I keep saying that you can never have enough cards on hand, I guess I need to start using them...lol I loved the PP and am in love with birds at the moment. It's hard to see from the pic, but I stamped the bird with Mocha Chica stamp set and colored in with watercolor pencils from SU ! Enjoy and have a great Easter !! DCWV patterned paper, SU ! stamp set, ribbon & cardstock unknown.

Thursday, April 9, 2009

Prima Egg

Good evening, it's Becky today with a project I've been sooooo excited about! I got the idea for this egg from here. I bought a package of styrofoam eggs from Hobby Lobby, I think it was around $3, and then covered it in Prima Flowers, held in place with quilting pins. It was so easy and I absolutely LOVE how it turned out. Oh, and if you're interested in the "hand crafted, one of a kind pottery dish" the egg is sitting in, Abie has offered to make these and sell them ;)
So, to package these babies up, I cut out the square box from Bags, Tags, Boxes and more cartridge on my Expression and used the Fit to Page feature. It cut the boxes at 8 3/4 which turned out to be the perfect size to hold the eggs. I also used the window feature and prior to assembling the box, I adhered a small square of acetate. For the tags, I stamped the image and embossed with Ranger Sea Foam embossing powder and cut it out with my Scalloped Circle Nestabilites. I made a total of five of these for different people and I hope they love them as much as I do!


Wednesday, April 8, 2009

Cards to Keep

We're halfway through the week !! Running short on time today, playing bunco tonight !! This is another card I made to keep on hand (you can never have too many !!) I used my wonderful SU! stamps and scallop punch....have a great day !! Stacy